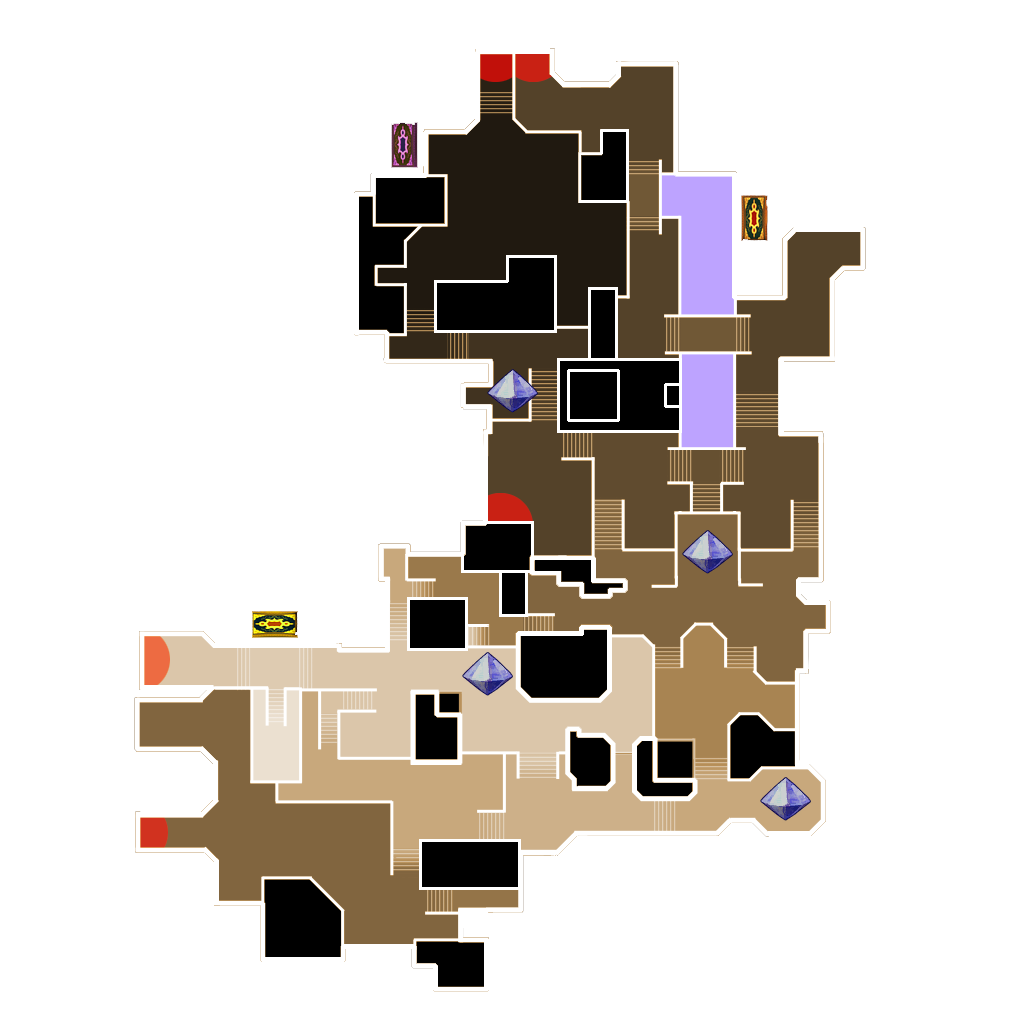


Quickly test tower tweaks directly in this build view. Changes are not saved.
Click on a numbered hint marker on the map to zoom and highlight nearby towers. Double click on map to reset zoom.
No hint selected.
Highlight placed towers (Chrome limitation applies)


| Hero | HP | Damage | Range | Rate |
|---|---|---|---|---|
| Hermit | 4153 | 8378 | 4946 | 2725 |
Build Status: Public
Difficulty: Any
Game Mode: Campaign
Hardcore: No
Ruthless: No
AFK Able: No
Mana Used: 0
Mana to Upgrade: 0
More Builds from Renim ☕
I try to upgrade all beams except the one near marker 3 to 1 star before the wave. Will then move towards the invincible genie king and kill the mini djinnlets then go around and upgrade all beams to 3 star during combat, returning to the genie king's location to kill the djinnlets again.
Arrows are directions, number of extra tips is number facing that direction.
Beam near hint 5 I try to start just inside the door frame so if the genie king spawns in the spawn location closest to the golem he can't snipe it.
I try to aim the 3 seed towers to cover both directions enemies can come from, you can rotate them slightly if need be, but I typically don't need to.
Beam near hint 4 I place in such a way that my 3x seed towers cover both directions.
I had issues with my seedbomb towers dying on hint 4 which is why there are 2 golems, if you have higher HP it might work with just 1 but I prefer 2 as it makes that one much safer.
required stats is just what my herm has for stats. I didn't do super thurough testing to see how far low it needs to go. None of my pieces breach ~2k total stats anyway, so it feels fairly good.