


Quickly test tower tweaks directly in this build view. Changes are not saved.
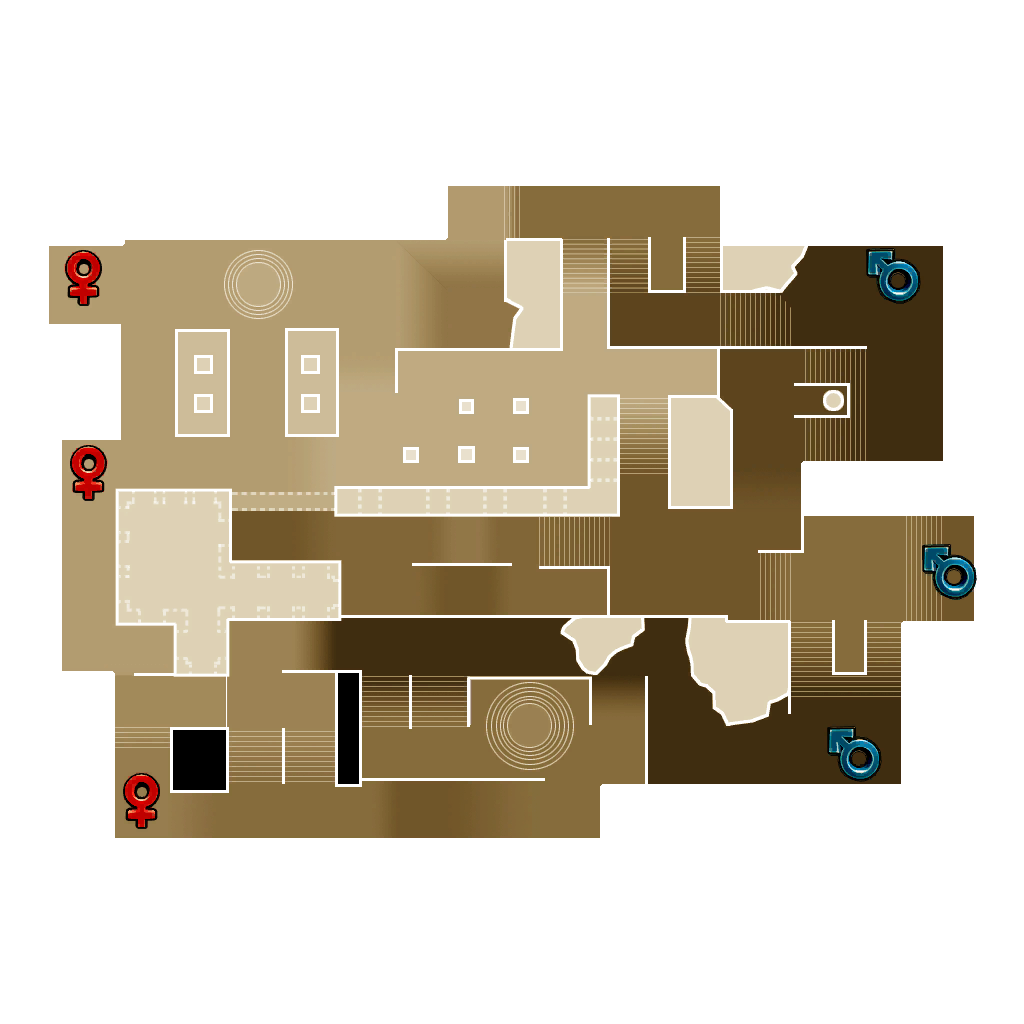
Click on a numbered hint marker on the map to zoom and highlight nearby towers. Double click on map to reset zoom.
No hint selected.
Highlight placed towers (Chrome limitation applies)


| Hero | HP | Damage | Range | Rate |
|---|---|---|---|---|
| Huntress | 3300 | 7900 | 4600 | 4100 |
| Monk | 4400 | 4300 | 8500 | 2900 |
Build Status: Public
Difficulty: Ruthless
Game Mode: Campaign
Hardcore: No
Ruthless: Yes
AFK Able: No
Mana Used: 0
Mana to Upgrade: 0
More Builds from Sleepy
Put your tower damage gear on your trapper as she'll be doing the heavy lifting. I haven't tested at other stats.
First Build Phase
- Build the auras (Strength Drain and Electric).
- Build the north and south buff beams for the traps.
- Switch to your damage trapper. Build during the wave.
First Combat Wave
- First build a Gas and Proximity Mine Trap at the north and then south trap stack areas.
- You'll be getting lots of mana during the wave from the mobs dying.
- Upgrade the buff beams while building the rest of the traps (Inferno and Ethereal Spike).
Second Build Phase
- Switch to your EV. Build during the wave.
Second Combat Wave
- Build the rest of the beams (1 buff beam, 2 walls, 3 reflects).
- Do whatever you feel like with the leftover time.
Third Build Phase
- Build Shroom Pits at Hint 1.
Rest of the Time
- Upgrade to the level you feel is good.
- Do the secret.
- Once you are done with upgrading and doing the secret, switch to your tower booster.
- For the last two waves, make sure your character(s) are at Hint 1, or the pathing of the enemies might get funky in a bad way.
- On the last wave, have the following out:
- Huntress
- Hero Booster
- Tower Booster
- Damage Trapper
Tip:
When initially collecting mana, it's fastest to start with the chest at Hint 2 and then go counterclockwise collecting chests from there (heading towards Hint 3 next indicated by the green arrow), building the auras or buff beams as you go (north first). The chest at Hint 4 will be the last chest you pick up before switching out to your aura monk or EV (depending on which one you started with first).