


Quickly test tower tweaks directly in this build view. Changes are not saved.
Click on a numbered hint marker on the map to zoom and highlight nearby towers. Double click on map to reset zoom.
No hint selected.
Highlight placed towers (Chrome limitation applies)


| Hero | HP | Damage | Range | Rate |
|---|---|---|---|---|
| Apprentice | 1500 | 2500 | 1500 | 2500 |
| Huntress | 1500 | 2000 | 1500 | 1500 |
| Monk | 1500 | 2000 | 1500 | 1500 |
| Ev | 2000 | 2000 | 1500 | 1500 |
| Summoner | 2500 | 2500 | 1500 | 1500 |
Build Status: Public
Difficulty: Nightmare
Game Mode: Survival
Hardcore: Yes
Mix Mode: Yes
AFK Able: No
Mana Used: 0
Mana to Upgrade: 0
More Builds from DarkArchon
Moraggo Survival Build, Nightmare Hardcore Mix Mode, Wave 35
Semi-AFKable @ ~3k Stats
I run this with Jester Upgrader at first, then switch to Apprentice+Summoner duo (for Bloodshot Staves).
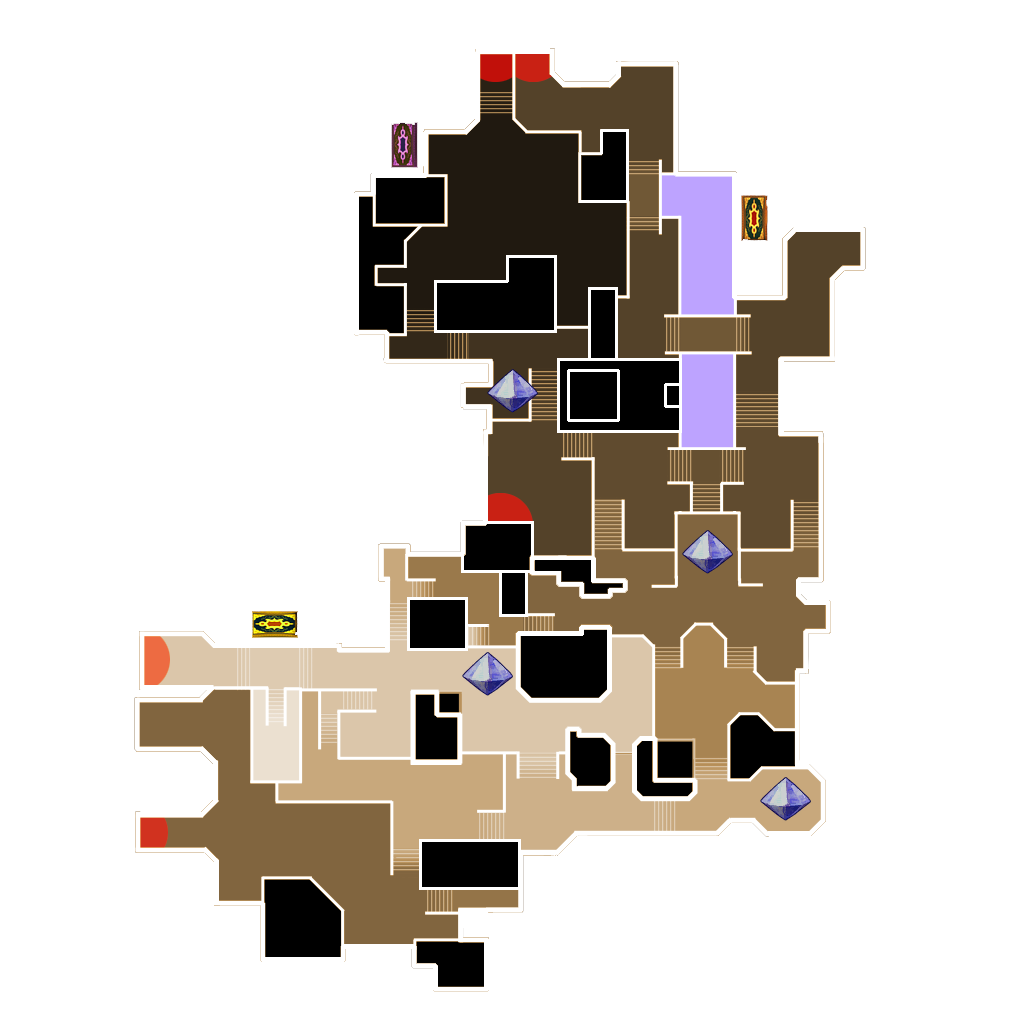
Hint 1 (Northwest Crystal): Place Aura Stack on stair railing to the right of crystal. The left Prox Trap is to help with Sharken rounding the corner. The south Prox Trap is extra and can be moved/replaced. 4 LTs and 1 DST on 4DU Buff Beam in the northeast nook, no stacking required. I like to put an Archer with my LT's, all behind Reflect Beams, in case of spiders/genies. Death Striker points toward the green "1" to the far right, where Copters fly in, but can also hit the bridge.
Hint 2 (Southwest Crystal): Place Aura Stack at corner right of Donkey. The Minion Wall w/ 4DU Buff Beam is next to the jars & junk in the corridor, so as not to be too close to the crystal. 3 LTs and 1 DST on 4DU Buff Beam along the wall left of Donkey. Death Striker points toward the blue "2" to the far left.
20 May 2019
One of the better Moraggo builds I've used. Using a huntress with emphasis on tower health is helpful as the traps will run out quickly, but you can also move the traps a little back. Otherwise this build is really balanced and no side dies much faster than the others. My stats are 3k with emphasis on certain stats and it worked out really well.